Wednesday, September 30, 2009

My first real Hybrid project!

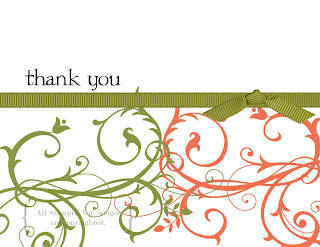
I started off with this 8 x 8 scrap book page made on My Digital Studio from Stampin' Up! I used the designer pre-made page from the Rock-a-bye boy kit. I removed the bow that was on the page. I then printed it at home. That took a little bit of trial and error. You need to adjust the print settings. Make sure you put it on custom and move the borders so it will print the true size ( unless you want it to print smaller). Of course if you send it to the printing service through Stampin' Up! it will print true to size! Also I found that the color was more true ( with my printer any way, Stampin' Up! only guaranties true color on your projects when you use their printing services) when I printed on semi glossy photo paper. It looked pretty good on Whisper white, but I preferred the look on the photo paper.


After I printed the page I trimmed it. Then I layered it onto a piece of Chocolate chip cs ( 8 1/2 x 8 1/2) then I tied a piece of Choc. Chip ribbon around the page right on top of the printed piece of ribbon! I then layered again onto a piece of textured Very vanilla 12 x 12 cs.


I really love how this turned out! The whole process (even the printing errors) only took me 15 minutes! That's from start to finish! When was the last time you made a page that fast?
Please tell me what you think about this layout!
thanks for stopping by,
Jennifer Jones

Monday, September 28, 2009

FREE stamp set!!

place a $25 order in the next 2 days and you will be entered in a drawing to win any $25 stamp set your choice!! I must have your order no later then 3 pm on Wed. Sept 30th 2009!

And as a bonus the first 3 who submit their orders either to me or online will get a surprise gift you are sure to love!

To be entered into my drawing you can email me your order, call me with your order or place an online order. All orders must be in by Wed Sept 30th at 3 pm to be eligible to win the free $25 stamp set! Don’t forget I do need your payment with your order. any questions please contact me!


Jennifer Jones
Your Independent Stampin' Up! Demonstrator
541-902-9286
ocustamp@msn.com
My Stampin' Up! website
www.ocustamp.stampinup.net
My Bloghttp://jennifersstampaddiction.blogspot.com/
my recruit password ocustamp
If you LIKE what you SEE
but your WALLET says NO......
gather 6 ORDERSand have your OWN SHOW!

Sunday, September 27, 2009

Blog candy Winner!!

And the winner of my first Blog candy give away is...............


Oh wait the winner receives these cards


THE WINNER IS Tracy in Michigan
I will be mailing them as soon as I get your snail mail addy....
Thanks for posting! and keep coming back!!
Jennifer Jones

Saturday, September 26, 2009

halloween Goodies

I am really getting into Halloween this year!!

This set Twick or Tweet, from Stampin' Up! is just too cute! I have used every image from it!
So about the card.....
I made the card base out of Basic Black CS, I layered it with Elegant Eggplant. Layered again with Basic Black and Whisper white... I stamped the pumpkin guy on a piece of Day and Night DSP ( LOVE IT ) and then I used my blender pen to color him with Pumpkin pie ink. I used Dimensionls to pop him up. I added a piece of day and Night DSP to the side of the white panel. i tied a piece of Basic Black grosgrain ribbon ( with a piece of eggplant ribbon ) around that panel. I added 2 black brads to the top. I stamped the words in Basic Black ink on the bottom of the center panel.
On the inside I added another piece of Eggplant cs so I could write in my card.

For the box...

I cut a piece of pumpkin pie cs to 4 1/4 x 11 I scored it at 3", 5", 8" and 10" then turned it and scored at 2" Basically it is a 2,4,6,8 box but not. lol I cut all my flaps and put it together. I stamped the bird from Twick or Tweet and colored him. i punched him out with the 1 3/8 punch, then I9 punched out a piece of black with the scalloped circle punch. i stamped the words and punched out with the designer label punch, and punched out a piece of basic black with the designer label punch to layer. I tied a piece of stripped Pumpkin pie ribbon around the box then attached the bird with dimesionals.

thanks for stopping by!
Jennifer Jones

Wednesday, September 23, 2009

My Stampin' Up! story

My husband Mike and I married a little over 10 years ago, we had just moved close to his home town and I knew no one. As a wedding gift of sorts, one of his best friends wives wanted to help me make our invitations. We did most of it on the computer, but then we used these fancy scissors and a sticky pen and Embossing powder, Then this thing that should have belonged to a plumber to make the powder melt..... OH I was loving this!! So off the the craft store, I bought a rubber "thank you " stamp and 3 markers... I made my own thank you cards... all 100 of them using markers and a rubber stamp.

2 years later I was visiting my family over 500 miles away. My dad had given my husband a Boat. We went and while we were there my Sister in law invited me to a "Stamp Camp" We made a Birthday calendar. Each station had a different technique... and all these really cool rubber stamps and the ink.... I was in Heaven! It wasn't long and I was showing my mom, sisters and anyone else how to do the neat thing I just learned at each station. My Sister in law was quick on her feet, she knew I was leaving in the morning, so she gave me a catalog, and all the paperwork I would need to sign up, sense I was so far from her and I was so "great at helping others to stamp" . She told me all about this company that she sold for and all the fun things that go on. ALL the way home I talked to my husband about how much fun I had, I told him all about the neat stamps, and the Business opportunity. For 8 hours I talked about it. That Friday when we got paid my husband called to see what I was doing for the day, I told him how excited I was, I had just sent in my starter kit forms... he had no idea what I was talking about! MEN!!

I called the only person I knew in town and asked her to have a workshop.. I had never been to one, but they showed it on the video, so I knew I could do it. My first party was over $500!! I earned the Stampin' Start, and I only really knew 3 people in town, but that was soon to change! But I was just going to do enough workshops to pay for my new hobby...

Now almost 8 years later, I have 2 downline and LOTS of friends! I wouldn't know most of them if it wasn't for Stampin' Up! I still have never been to a Stampin' Up! workshop, besides my own! BUT I have so much fun, I LOVE to share what I love! and I am so blessed to have meet so many wonderful friends in person and online because of Stampin' Up!

Now more than ever I love my job! I have 4 boys, and if weren't for my Stampin' Up! business I would have to go outside my home to get a "real" job. What could be better than going to work playing with my rubber stamps and making wonderful gifts for friends, family and even strangers!

Oh and my husband has learned that he needs to pay attention when I am talking!


If you think you are ready to start your own Stampin' Up! business let me know, I would love to help you get started!

Jennifer Jones

Monday, September 21, 2009

Sept. 22 Card CLASS & BLOG CANDY

These are cards for my card class

Beary Best friends and Beary nice wishes stamp sets, paper piecing
Delightful Decorations stamp set, SHIMMER PAINT!!


Twick or Tweet stamp set, Night and day DSP large Gromet inspired by the talented Connie Babbert


Falling leaves, texture plates ( idea cased from http://juliedavison.com/ )


The more the Merrier (hostess level 3) Snow fall window Sheets! and again inspired by Connie Babbert


All supplys for these cards are from Stampin' Up! If you cannot attend my class, you can purchase any of theitems to make these cards either by contacting me or by going to my website, click on the white Shop Now button.


BLOG CANDY!! Become a follower , or leave a comment and one lucky person will recieve all these cards! Blog candy winner will be announced on 9-26-09
thanks for stoping by,
Jennifer Jones

Saturday, September 19, 2009

MDS cards

I have been busy all day playing with My Digital Studio from Stampin' up! Boy you are going to love this thing!! I made another album, and I just whipped up this card! The first photo is the card printed and then I added the REAL Old Olive grosgrain ribbon.


This next picture is the card in MDS, not printed with the "fake" ribbon.


I have been wanting to make this simple card sense I received my copy of MDS, but have been way to busy... and what do you know it only took me a few minutes to make! I could have had this done days ago! OH well...
So here are a few tips for you for printing your card at home, now mind you this is the first one I printed.
  1. make sure you have your card stock of choice in the printer
  2. select print
  3. select advanced
  4. select custom layout
  5. move your margins to arrange the card in the preview window to how you want it to print
  6. select Okay

You know can cut your card stock in half! add any additional embellishments to your card and you are done!!

If you are in Florence, Oregon on the 26th of Sept, please stop by between 1-5 pm for more great tips!

happy stamping,

Jennifer Jones


Friday, September 18, 2009

stampers group meeting

My stampers meeting was a little off yesterday.. We were supposed to meet in the evening, but sense my oldest boy had a home football game (they WON) we meet during the day. Bad thing about that is that meant there was only 3 of us, good thing is that they got lots of extra goodies from me!
We made this super cute basket, I got the idea, instructions and everything for this from Becky over at Inking Idaho. She is the greatest and always has wonderful Ideas! The only thing I did different was I used 6 ovals for each pumpkin. I made the pumpkin, used a piece of Close to cocoa for the stem, and attached it to the front of the pumpkin. Then I added one more oval, this way the pumpkin looks good from all sides and it gives it a little more depth.

The next thing we made was a card using the sweet centers stamp set from the mini catalog. I basically did the same card as Mike Funke . I used Tasty sweet 111698 $19.95 for this card. I stamped the candy corn randomly over the whole front, and I embossed it in white on the back of the black tag ( see pic below) I love this set! I just love how this turned out!

For our final card we made this cute little guy, I was a total card caser this week! But Hey why reinvent the wheel (or card) when someone already has made a perfect one??? So I got this idea from Lori Ames , she said she got it from someone else.... you know! anyway For this card I used Lovely lilac and Green Galore. I cut the lovely lilac 4 1/4 x 2 3/4 and then used my scissors to make that great hair do! For the eyes and nose use the 1 inch circle punch and punch out 2 Green Galore and 2 white circles. Cut both Green Galore circle's in half and sponge with Green Galore classic ink. Use the 3/4 inch circle punch for the black. Stamp Friend. Good. ( from the stamp set Smarty pants) in Lovely lilac on Franks head ( I have always wanted a reason to use that stamp!!) now assemble your monster. Once assembled you will need to make his mouth and scar. I used a Basic black stampin write marker, the bold tip for the mouth and scar and the thin tip for the stitches. Also you will want to use the Singlo pen for a highlight on his pupils.

Thanks so much for stoping by!
Jennifer Jones

Wednesday, September 16, 2009

Build-a-Bear - Bath time fun


While at my sister and Brother in-laws over the weekend, I was giving my youngest son Chance (2 1/2) and his cousin Colton ( 3) a bath. Colton had a foam alphabet to use in the tub, the letters stuck to the tub when they were wet. This made me think..... I have fun foam, and I have Build-a-Bear sizzix dies. So today I gathered up my fun foam, It really is FUN!, and got out my dies. I was a little bummed to find that I did not have any brown foam in my stash...Oh well bears are white too!


I cut out my bears and then all my clothes. There is a little sleeve in with the clothes but it is such a little piece I will not let the little ones play with it.


I had to check out my work ... so off the the bathroom I went! All I need now is water, and wa-la! ( is that how you spell that???) They stick!!!
okay thanks to all who helped this spelling challenaged person ( thank goodness for spell check, too bad it's not always right!) So voila’
they sitck!! lol


I just love how this works! I know that Chance is going to have lots of fun playing with these! And even if he doesn't I know that I will!!
I don't have it pictured but to store these cute little guys and all the clothes I am using an empty stamp set box.
If you are in Florence, OR please come to my Mystery Hostess Workshop on Sept. 26th for more great Build-a-Bear ideas!
Until next time,
Jennifer Jones

Tuesday, September 15, 2009

Mystery Hostess Workshop


Jennifer Jones


Friday, September 11, 2009

My digital Studio!!

I just want to share with you what I whipped up last night. Took me longer to figure out how to share the page than it did to make it!


If you are interested in My digital Studio, I will be teaching a little class on how to use it here in Florence, Oregon, along with Build a bear on Sat Sept 26th. You can always keep up to date with my classes by checking out my Stampin' Up! website. More info on that event will be posted in the next week.


Here is my very first digital Scrapbook page!
Thanks for looking!
Jennifer Jones

Thursday, September 10, 2009

Shimmer paint!!

Wow what a busy week! 3 of my boys are back in school, YEAH!! Now I might just have time to stamp and share each day!!

ANY way back to the card. I LOVE the new Shimmer paint. On this card I used Platinum item #116807 ($5.95). Don't you just love how it shimmers!!


I did double duty with this card I did ways to use it challenge 235. RED. you can see the whole gallery here . And I promised I would use the Simmer paint this week on a card.


I used Delightful Decorations and Teeny Tiny Wishes. I used a Sponge dauber to apply the simmer paint to my stamps before stamping. You will want to let the image dry for a minute or so before you punch it out.
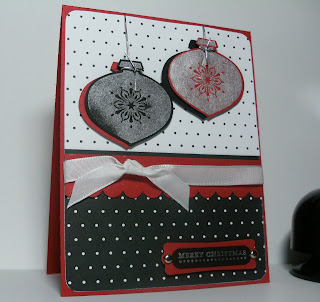
Also used on this card was Day and Night DSP and whisper white Taffata ribbon. I used the scallop edge punch, ornament punch, corner rounder, word window and designer label punch.
Card stock is just Real read and Basic Black. Also I used Silver cording and silver brads.
thanks for looking,
Jennifer Jones

Saturday, September 5, 2009

411 challange 115

This is the card I made for Stampin 411's challenge 115.

WOW what a fun challenge. And boy did I need the push. I have been in a bit of a rut lately. I think it has to do with all the stuff going on, the garden is ready and I have lots of canning to do. I have been feeling pretty guilty when I go into my stamp room knowing I should be in the kitchen working on Beans, or Pickles or oinions or carrots you get the picture!


But I decided that today I would stamp before I got to work in the kitchen, and I am super glad that I did!
I had so much fun making this card and I am SO LOVING this new set from the mini catty! Twick or Tweet item # 116497 for $18.95 and the new DSP Night and Day #116768 for $11.95 this paper comes with 2 black polka dot window sheets! How cool is that!


I used Basic Black cs for the card base, then layered that with Pumpkin Pie cs. I then used a layer of DSP from Night and Day ( 2 3/4 x 3/ 3/4) I love the swirls on this piece! I used a piece of Basic Black (2 3/4 x 5) and layered that with Pumpkin Pie again and then the DSP with writing from Night and Day.


I Stamped the Jack-o-lantern's on another piece of the Dsp with writing in Craft Basic black, then I sprinkled on iridescent ice Embossing powder. Heated that up with the Heat gun and WOW! I do love glitter! I used my Blender pens to color them in with Pumpkin Pie ink, and then I cut them out.


I Stamped them again using the Craft Basic Black onto the DSP for the card, and then used Dimensionals to pop them up.
I tied a piece of Black Grosgrain ribbon around that layer and then used Dimensionals to pop the whole thing up.

I was going to add a sentiment to the card, but I decided that I liked it just the way it was!
I can't wait to play more with this set, but must get back to the kitchen for now!

thanks for stopping by,
Jennifer Jones


http://www.stampinup.net/esuite/home

http://www.stampinup.net/esuite/home

Shared via AddThis

Friday, September 4, 2009

Big Shot Hero

I wish I could be as creative as some people! Stampin' Up! had a contest at Convention for the best commercial. I was unable to attend convention this year, but this is the winner. I wish I could have seen all the others as I am sure that they were all great!
I hope you enjoy this!


Jennifer Jones